
“I don’t know what that gunk is in the jar, but can’t we get it off the kitchen table?”–This from my husband a few days ago.
“No! That’s my soil test!”
The soil at our new house seemed sticky to me, and fearing that I would be dealing with clay for the next several years, I did a simple do-it-yourself test to determine what type of soil I would have in my new vegetable garden.
All soils are made up of tiny particles, each of which belongs to one of three categories:
- Sand particles are the largest of the three. Soils composed of mostly sand offer excellent drainage, but do a poor job of retaining water and nutrients. They have to be watered often and fertilized carefully, lest the nutrients wash away.
- Silt particles are smaller than grains of sand. Silty soils are plant-friendly. They make nutrients and water readily available to plant roots, but they drain freely and allow roots to “breathe”. Loam, the stuff that gardeners dream about, is composed mostly of these medium-sized particles.
- Clay particles are microscopic, and they bind together tightly. Clay soils are rich in nutrients, but dense. They are gooey when wet and as hard as a clay pot when dry. They are no fun.
The test I did is described by Steve Solomon in both his Growing Vegetables West of the Cascades and Gardening When It Counts. The goal is to separate the particles in your soil and determine the proportion of each.
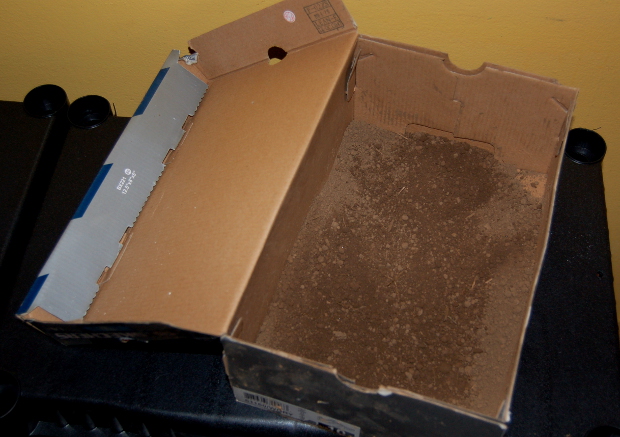
Per his instructions, I gathered two cups of soil, picked clean of roots and stones as best I could. (There are tons of rocks in my soil, ranging in size from bb’s to cantaloupes. The reason for this will be explained in a little bit.)
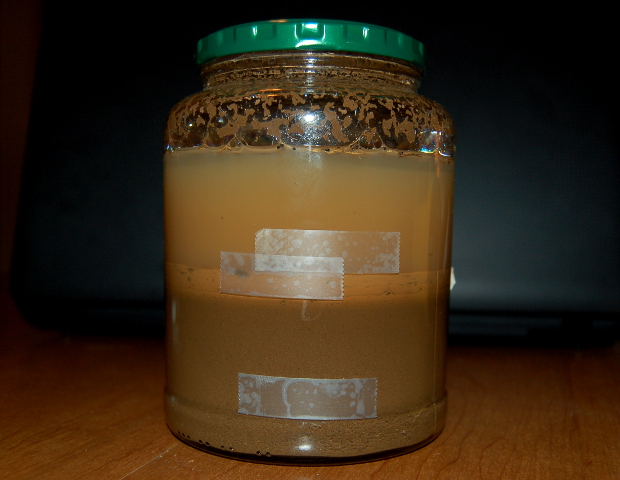
I put the dirt in a clean quart sauerkraut jar and marked the soil line with a piece of tape. Then I added a squirt of dish soap (this helps the particles to separate), filled the jar with water up to one inch from the top, and screwed the lid on tightly.
If you are following along at home, now is when you shake the jar vigorously until your arms fall off, or for about ten minutes.
Set it down. After two minutes, you’ll see how much sand has settled. Mark that line with another piece of tape. After two hours you’ll see how much silt has settled on top of the sand. Mark that, too. The remaining portion is clay. It may take several days for the clay to settle completely and for the water to clear, but you already know how much clay is there, because you marked where the original soil line was. All that is left is to measure the layers and calculate the sand, silt, and clay fractions of your soil.
It was a little difficult for me at first to see the distinction between sand and silt. Turning the jar around and shining a flashlight on it made it more clear. The sand had settled unevenly along the back side, and it clearly appeared more coarse than the silt. The clay layer was quite obvious. It looks like peanut butter:
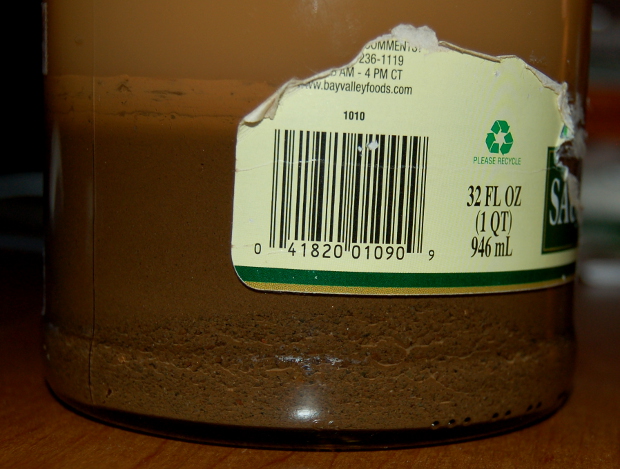
I approximated the layer of silt to begin at 15mm, the clay began at 54mm, and the total soil sample rose to 62mm. Hence, I have a lovely loamy (though rocky) soil, composed of 24% sand, 63% silt, and 13% clay. Hooray!
After looking further into the geology of the region (Portland, Oregon), this makes perfect sense. Thousands of years ago, the Missoula Floods, fueled by the melting glaciers of the last Ice Age, washed through the Willamette Valley, depositing gravel, silt, and tumbled boulders. I have alluvial soil–soil that was once a riverbed.
I’m not looking forward to picking up wheelbarrows-full of Missoula Lake rocks. But I think that once I do, my vegetable garden will be very happy here.
Anybody need some river rock?


Fantastic …I’ll try this out. Looks like you got some good soil to work with after all .
Linda, Well, my next test is to dig a deep hole and see how far down the rocks actually go. But yeah, I’m quite relieved. Hope you have the same good stuff on the other side of the river!
I learned about this test years ago when I took the Master Gardener training course. I’ve never done it though…perhaps it’s time.
Loree, I heard about it a long time ago, too, but this is the first time I’ve tried it. It was neat to really be able to see the differences between the layers.
Awesome article.
Oh gosh, doing this right away. And yes, I can use river rock. Believe it or not, from what I little digging I hhttp://ave done, I have seen not a single rock.
Do you know about the Web Soil Survey as well? http://websoilsurvey.sc.egov.usda.gov/App/HomePage.htm You can find out your soil type by not even leaving the house! It is difficult to figure out how to use it, so don’t feel bad if it takes a while to learn how to navigate it. That’s awesome if you want some rock! I keep digging up more. It’s really pretty and multi-colored once you wash it off. I also have a big pile of rounded dark gray gravel that I’ve been separating out (it was brought in years ago), if you’d like something a little more formal.
Is the % of sand, silt and clay you have the ideal mixture? Or what is the ratio of ideal soil? The soil around my yard was compacted with rock and some clay & soil about 4 years ago when they built my house, which is built down a couple levels into a forest floor. So it is not the original soil completely.
It depends on what you want to grow, but basically you want a mix of sand, silt, and clay, with the clay component being no more than about 30 or 35%. What I have is just about perfect for most things, though it does drain very fast because I have so little clay, and I have to water the veggies a lot. Drought tolerant plants love it once they’re established. Here is a good website that gives names to the different soil types based on the ratios: https://www.nrcs.usda.gov/wps/portal/nrcs/detail/soils/survey/?cid=nrcs142p2_054167.
Hi Amy, I wanted to let you know I found your article about DIY soil test very helpful. Thank you, Richard
Hi, thanks for very helpful information. We recently built a house and had sod put in which has been failing over the past 2 years. I always suspected a soil problem as there seems to be a lot of clay in this area. I am going to test this soil and see if this yard is salvageable.