
Like any activity with a long history, gardening has its share of traditions. Some of these are sound practices, while others should have been thrown on the compost heap long ago.

Seed-starting is one gardening project that seems especially steeped in lore. And with good reason—the whole process of turning a dead-looking speck of dust into a vibrant, living plant is utterly magical! It seems only logical that ancient rituals and incantations must be followed to the letter in order for such a miracle to occur.
Alas, some of these practices are suspect at best. Here are five (indoor) seed-starting myths that continue to make the rounds:
Myth #1: Start your seeds on a sunny windowsill.
You just won’t get enough light on the proverbial south-facing windowsill. Oh, you’ll get seeds to germinate there, but they’ll become wimpy plants, stretching and leaning toward the light. If you want stocky, healthy plants, you’ll have to invest in some lights.
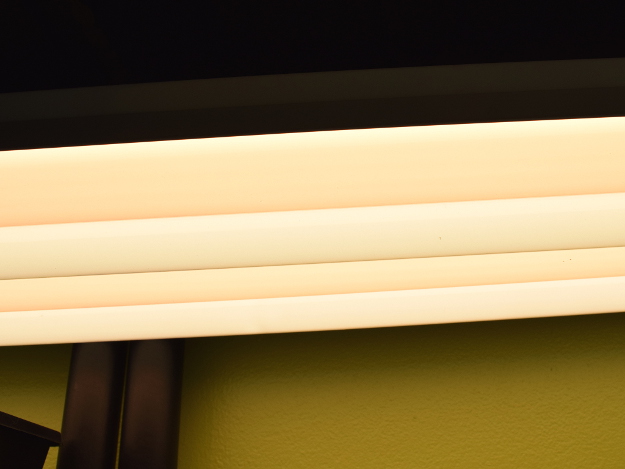
You don’t need special grow lights; basic fluorescent shop lights are fine.
The common fluorescents you’ll find are T12, T8, and T5. The numbers refer to the width of the tube in eighths of an inch. So T12 is 12/8-inch or 1 1/2-inch, T8 is 8/8-inch or 1 inch, and T5 is 5/8-inch.
T12 was the standard size for years. They’re supposedly discontinued, but you can still buy them. T8 lights give out about the same amount of light as T12s, but are more efficient. T8 is the new standard.
T5 lights are much more expensive than the other two, but they put out a LOT more light.
I didn’t do my homework, so I have the old T12s. They work fine.
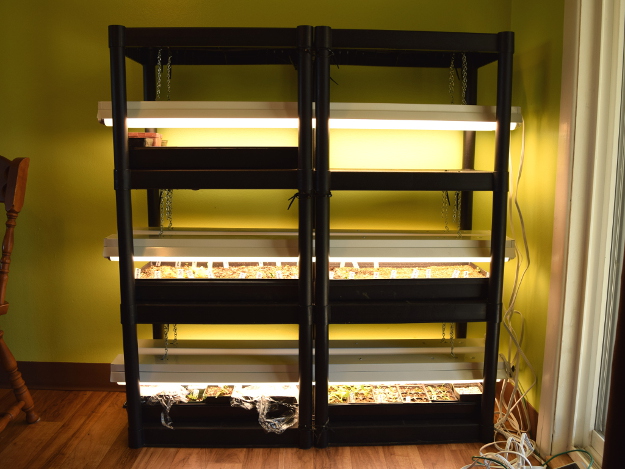
Here’s my setup. It holds six flats.
I built the first two tiers for about $115 using two sets of cheap plastic shelves lashed together with zip ties, four fluorescent lamps, and eight bulbs. When I ran short on room, I added another level for an additional $42. My husband dubbed it the “Congrowminium.”
It’s fantastic, and I’m a little smug about my own resourcefulness.
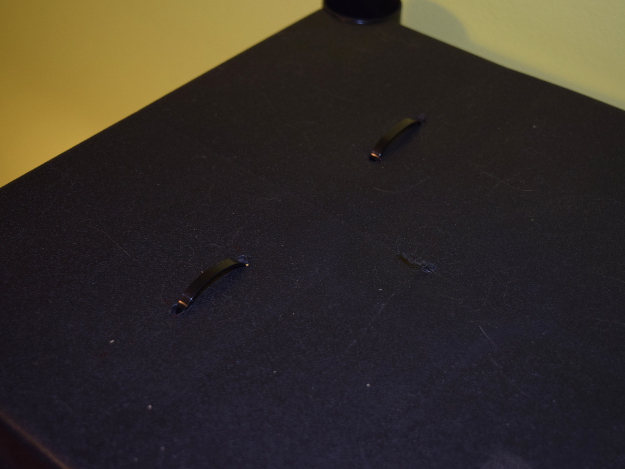
I punched holes in the plastic and threaded zip ties through to give me something to hang the lights from.
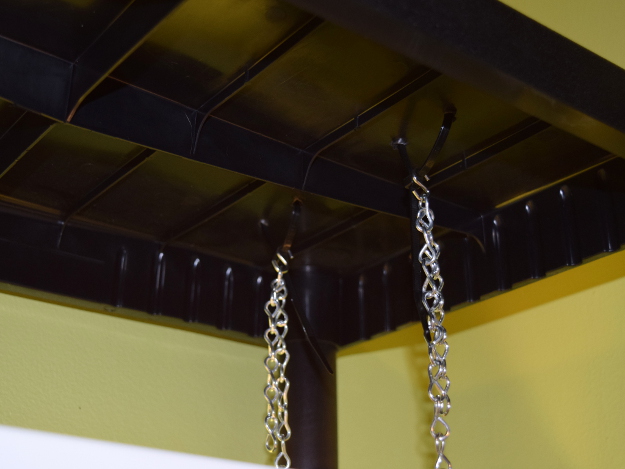
Then I got some S-hooks so I could hang the lights and move them up as the plants grew.
I found I needed to have the seedlings as close to the lights as possible to prevent stretching. They can even touch the lights—they won’t burn.
Incandescents get way too hot, which is why you don’t use regular light bulbs to start seeds.
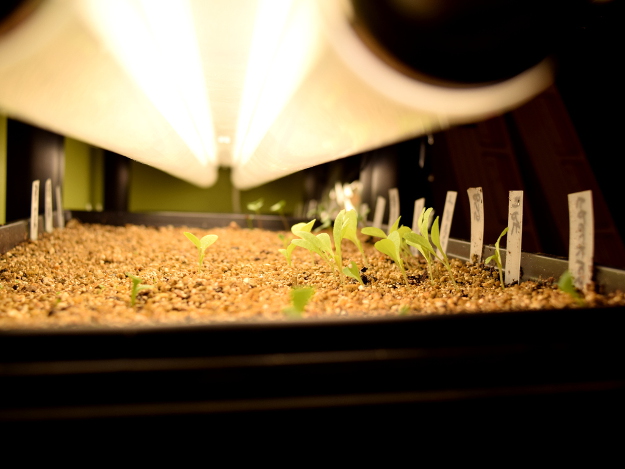
I started out with only one lamp (two bulbs) per shelf, and it wasn’t enough, as you can see here with my leaning lettuces. So I hung two lamps side-by-side.
I leave the lights on for 15 hours a day.
Myth #2: Used yogurt cups and the like make great seed-starting pots.
I don’t futz with yogurt cups, egg cartons, or newspaper pots. In Creative Propagation, 2nd Edition (Timber Press, 2005), Peter Thompson explains bluntly why doing so is foolish:
“Different volumes of growing media in containers of different shapes dry out at different rates. Seedlings or rooted cuttings in a motley collection of salvaged receptacles are impossible to care for properly. Well-designed containers for plants cost pence (pennies) to buy, and failure to use them costs the lives of plants worth 50 or 100 times anything saved by resorting to yoghourt pots.”
I love how he spells yogurt the British way, making the word drip with extra disdain.
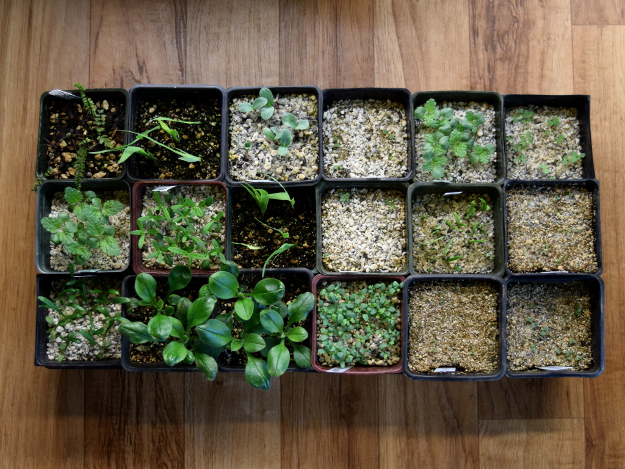
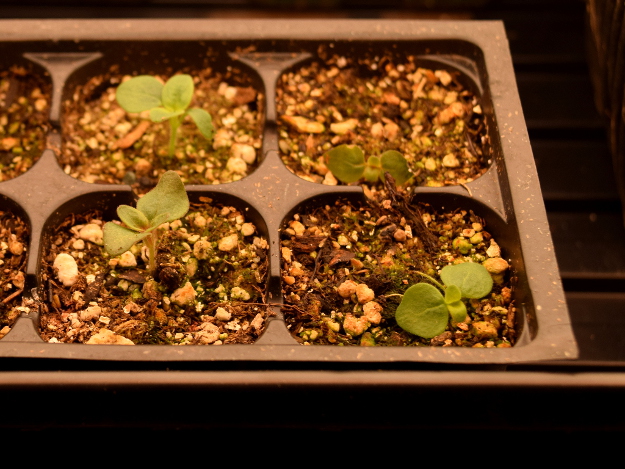
Recycled cups are also not great because they’re round. Square pots make more efficient use of space. Eighteen square 3 1/2-inch pots fit neatly into a standard 1020 (10-inch × 20-inch) tray, so this is what I use now (after a brief fling with sowing seeds in open flats, which was an even bigger waste of space).
Myth #3: You need to wash your pots in a 10% solution of bleach before sowing.
This one is pretty well ingrained, and it’s hard for some people to let it go. The fear is that disease will run rampant through unwashed pots. While that can happen, the chance of it actually occurring is too slim to justify the colossal pain in the arse of washing your pots.
Peter Thompson has a few choice words for this time-honored practice as well:
“The ancient ceremony of pot washing raises its hoary head when containers are to be reused. This is an unnecessary and time-wasting activity, especially as practiced by amateur gardeners, who use containers to house an ever-changing variety of different plants. Very few pests or diseases are passed down through dirty pots—and whenever this is a serious risk it is more economical to use new containers for susceptible plants than spend time washing old ones. When the urge to wash becomes pressing, remember that time spent washing is time lost propagating.” Amen!
I’m growing about 40 different varieties of plants from seed this year in dirty pots. The only trouble I’ve had so far with damping off disease (the big fungal nemesis) has been with snapdragons. That’s enough proof for me that washing pots is a waste of time.
Except for when I’m growing snapdragons. Or sowing the last three seeds of Grandma’s prized heirloom tomato.
I do use sterilized media. Always.
Myth #4: You need to water your pots from the bottom.
To avoid dislodging the seeds with a spray of water, the garden pundits tell us to “bottom water.” This means setting your pots in a tray of water and letting the media soak up moisture from the bottom. The water eventually rises to the surface by capillary action. Eventually. It can take 30 minutes for the moisture to mosey up to the seeds, and basically…

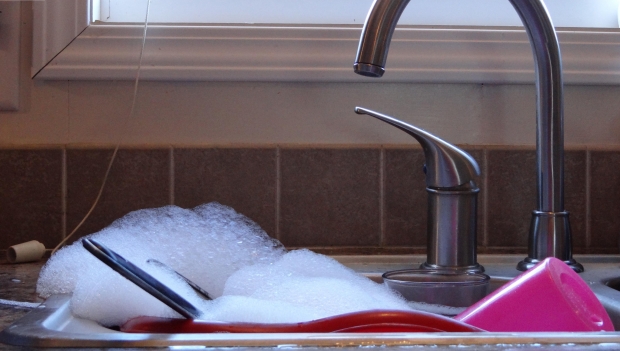
I top my pots with a thin layer of chicken grit mixed with perlite for large seeds or a thin layer of vermiculite for small seeds. This helps to keep the seeds in place and also helps to keep the surface dry and free of fungus. Then I water with a gentle stream of lukewarm water from the kitchen sink sprayer as low as it will go.

For subsequent waterings I use a bulb sprayer I improvised from a thin plastic water bottle.
I made a few holes in the cap with a small nail, and Voilà! Gentle stream of water.
Myth #5 Don’t damage the taproot!
This one I’m questioning after an experience growing orange butterfly weed (Asclepias tuberosa).

When it came time for them to be “pricked out” (moved into their own containers), I found that the little devils had already made these ginormous taproots. What to do? They wouldn’t fit in the little cell packs they were destined for.
So I pinched off a good third of the taproot. And they lived. In fact, they’re doing just fine.
I wouldn’t generalize that this would work with any taprooted plant without some more experimentation, but I put it out there to illustrate that in gardening there’s a lot of information that’s passed along as fact and never questioned. Myths continue to be propagated (pun intended) and held as truths. New gardeners accept the wisdom of the elders.
In your own gardening journey, do something against convention now and again! You might be surprised.

I do love a good myth-buster. Thanks for sharing the wisdom.
Loree, Thanks! Glad you enjoyed it.
Love that you spell ass the British way 🙂
That came from reading Peter Thompson (though I don’t believe he uses that word). I can’t quite bring myself to write “yoghourt,” however.
I want to be like you when I grow up. Surely I can manage to grow something from seed. I think I’ll need to start outside–with one edible! Dog, I hope I’m up to the task…
Patricia, Ha, you’re too funny. How about you give me some cuttings and I’ll help you grow something from seed. What do you want to grow?
I love that you included Sweet Brown!! That line is always funny. I do love my bottom watering but I water from the top a lot, too. I’ve found that it’s a dicey bet as to where the lights need to go. I’ve had a few plants develop yellow spots from too much light. What are you growing?
In propagation there are a lot of different roads to success, and everybody has their own methods.
I have been moving my seedlings outside and I’m on to my new obsession–softwood cuttings!
But from seed I’m growing baptisia, amsonia, leycesteria, rue, nicotiana, hypericum, candy lilies, asclepias, gazania, gaillardia, cerinthe, platycodon, moluccella, Verbena bonariensis, alpine strawberries, a couple euphorbias, echinops, emilia…
Amy,
I love this article! Thanks for mentioning that not all seed starting receptacles are created equally. When I was teaching high school ag, I had a greenhouse student do an experiment one semester with starting seeds in different containers.
She grew seeds in open flats, square peat pots, square plastic pots, toilet paper tubes and the traditional 6-cell plastic trays. The toilet paper tubes were hard to keep moist and the open flats were a nightmare to transplant from. I’m also not a fan of the square peat pots. I’d much rather use the plastic, square seedling pots and the 6-celled plastic trays. They’re much easier to keep moist and transplant from. And to reiterate what you said, they’re a much more effective use of space.